


Minecraft can be daunting to new players and for many, it’s hard to get stuck in. With this guide for Minecraft, you can learn everything from initial shelter building to building a nether portal. These top Minecraft tips for noobs will set you on the right track and you will be a Minecraft addict before you know it.
Before You Begin: Choosing Your Minecraft Experience
Understanding Minecraft Editions
Java Edition vs Bedrock Edition:
Java Edition (PC/Mac/Linux):
- Most extensive mod support
- Free skins and texture packs
- Redstone mechanics differences
- Server hosting flexibility
- Requires better hardware
- Price: £23.95
Bedrock Edition (Cross-platform):
- Play across devices (mobile, console, PC)
- Marketplace for content
- Better performance optimization
- Cross-platform multiplayer
- Simpler redstone mechanics
- Price: £19.99-£26.95 (platform dependent)
Which Should Beginners Choose?
- Java: If you want mods and PC-only play
- Bedrock: If you want to play with console/mobile friends
- Both: Java purchases now include Bedrock on PC
Game Mode Selection for Beginners
Survival Mode (Recommended for first-timers):
- Learn core mechanics naturally
- Experience progression system
- Understand resource value
- Face manageable challenges
Creative Mode (For learning building):
- Unlimited resources
- No health/hunger management
- Flying enabled
- Good for planning projects
Peaceful Difficulty (Training wheels):
- No hostile mobs spawn
- Health regenerates automatically
- Still need food for sprinting
- Perfect for young children
Minecraft Beginners Guide:
1. First things first – Chop down a tree and gather wool from three sheep
The wood and wool allow you to make a bed that acts as a future spawn point as well as a way to avoid the night creatures in the beginning of the game.
2. Your first home
Before the sun sets on the first day try and get a small house built (about 5×5 is fine). This can be done with dirt and only has to have walls of 2 blocks high to keep out the night creatures. Seal yourself in on the first night as you can always dig you way out in the morning. Dig down a few layers (keeping in mind you will need a dirt staircase and place your bed… Go to sleep, you have a big day in the morning
3. Crafting tables and furnaces
In order to make almost anything, you need a crafting table. Once created you can make everything from a rudimentary wooden axe to a fully powered train track. However, in order to cook food or smelt ore into usable materials, you will need a furnace and something to burn.
TASK LIST:
First Day Survival: The Critical First 10 Minutes
Immediate Priorities (In Order)
1. Punch Trees (0-2 minutes)
- Hold left-click on tree trunk
- Collect 20-30 wood blocks minimum
- Different wood types are cosmetic only
- Look for oak trees (easiest to spot)
2. Create Basic Tools (2-4 minutes)
- Open inventory (E key)
- Convert logs to planks (1 log = 4 planks)
- Create crafting table (4 planks)
- Make wooden pickaxe first
- Craft wooden axe second
3. Find Stone (4-6 minutes)
- Look for grey blocks in cliffsides
- Dig down carefully (never straight down!)
- Collect 20-30 cobblestone
- Upgrade to stone tools immediately
4. Locate Sheep (6-8 minutes)
- Need 3 wool for bed
- Same color preferred but not required
- Kill with sword for better drops
- If no sheep: find spiders at night
5. Build Shelter (8-10 minutes)
- Minimum 3x3x3 interior space
- Include door and torches
- Roof prevents spider access
- Place bed immediately
First Night Survival Without Bed
Emergency Strategies:
- Dig 3 blocks down, cover top
- Build 4-block high pillar
- Hide in water (mobs can’t swim down)
- Mine all night (productive option)
Essential Minecraft Mechanics for Beginners
Health and Hunger System
Understanding the Hunger Bar:
- 10 drumsticks = 20 hunger points
- Sprint requires 3+ drumsticks
- 9+ drumsticks = health regeneration
- 0 drumsticks = health loss (except Peaceful)
Best Early Game Foods:
- Bread (3 wheat = 5 hunger)
- Cooked Meat (8 hunger + saturation)
- Baked Potatoes (5 hunger, easy farming)
- Apples (4 hunger, found in oak trees)
- Carrots (3 hunger, zombie drops)
Hunger Management Tips:
- Don’t sprint unnecessarily
- Avoid jumping while traveling
- Cook all meat before eating
- Keep food in hotbar always
Tool Durability and Efficiency
Tool Hierarchy: Wood < Stone < Iron < Diamond < Netherite
Durability Comparison:
- Wooden: 59 uses
- Stone: 131 uses
- Iron: 250 uses
- Diamond: 1,561 uses
Right Tool for the Job:
- Pickaxe: Stone, ores, metal blocks
- Axe: Wood, logs, wooden items
- Shovel: Dirt, sand, gravel, snow
- Hoe: Farmland, hay bales, leaves
- Sword: All blocks (slowly), combat
Pro Tip: Using wrong tool = 2x durability loss
Building Your First Proper Base
Location Selection
Ideal Base Locations:
- Near water (infinite source)
- Flat area for expansion
- Close to multiple biomes
- Visible landmarks nearby
- Cave entrance accessible
- Animals spawn nearby
Locations to Avoid:
- Desert (no wood/water)
- Deep forests (mob spawning)
- Extreme hills (building difficulty)
- Swamps (slimes and witches)
- Too close to villages (raids)
Base Design Fundamentals
Starter Base Checklist:
- 7×7 minimum footprint
- 2-high doorways
- Windows for visibility
- Torch every 7 blocks
- Chest organization system
- Crafting area setup
- Bed in safe corner
- Emergency exit route
Room Priorities:
- Storage Room: Sort items immediately
- Crafting Area: All stations accessible
- Bedroom: Spawn point security
- Farm Access: Indoor/outdoor connection
- Mine Entrance: Safe underground access
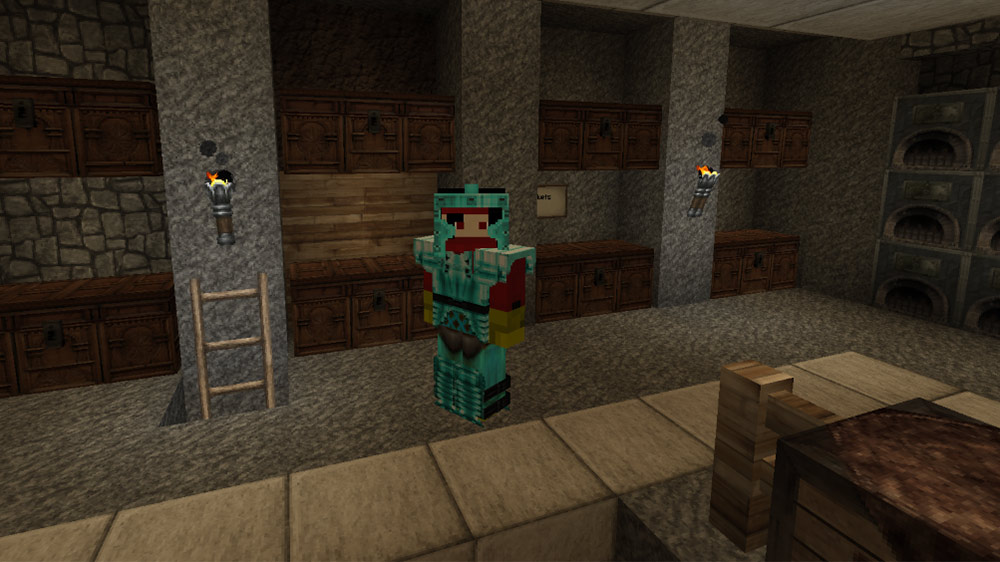
4. Torches are your best friend
Make sure you also have a good supply of torches. When mining they are invaluable to light your holes and when you discover caverns they are required to light them up. Many mines already have torches lit but there are many areas still in the dark. Torches also act as great map markers and can be placed at the top of towers and near doors to help players find their bearings.
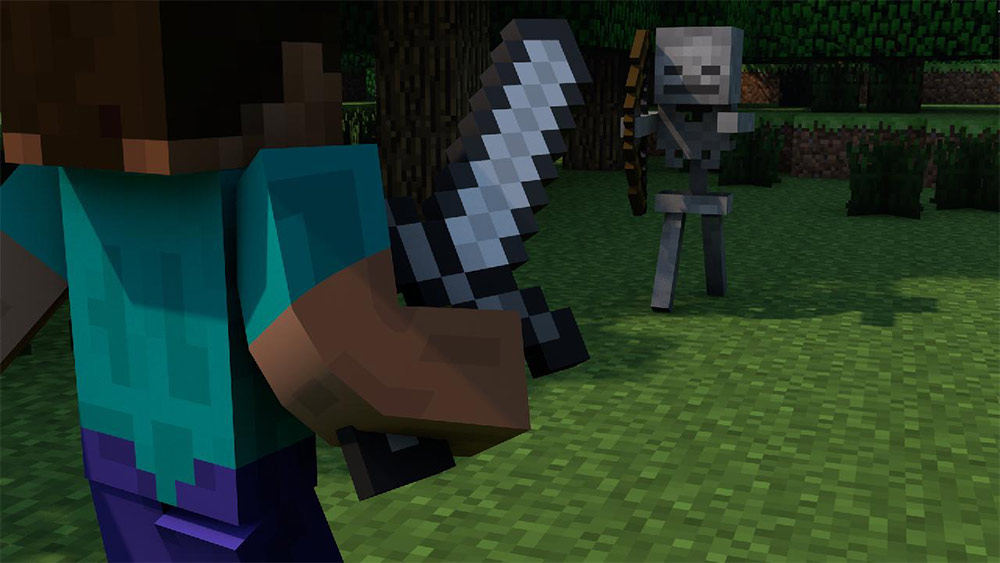
5. Bad to the bone
If you are out at night, the Skeletons offer the best rewards. The bones can be used to befriend wolves, be crushed down into bonemeal for use in dyes or fertiliser and best of all they carry arrows which can take a while to build.
6. Get some allies
Use bones to tame wolves which as to be used as team members and attack what you attack.
7. Don’t dig straight up or straight down
Digging straight down might seem the quickest way to explore the hidden depths below you but if you chance upon a mine or cavern you could fall and die losing all your gear. Digging straight up can result in two issues, firstly you could hit water and be washed down the shaft and potentially flood the mine you have just dug. Similarly, if you hit gravel or sand you might find yourself on the tail end of a cave in.
8. Dig under mountains
Mountains are a good place to start digging. Many mountains yield mine shafts and large caverns that not only have more ore but chests and tracks.
9. The right tool for the job.
When you see gold, emerald or red stone make sure you use an iron pickaxe to mine it otherwise it will yield nothing.
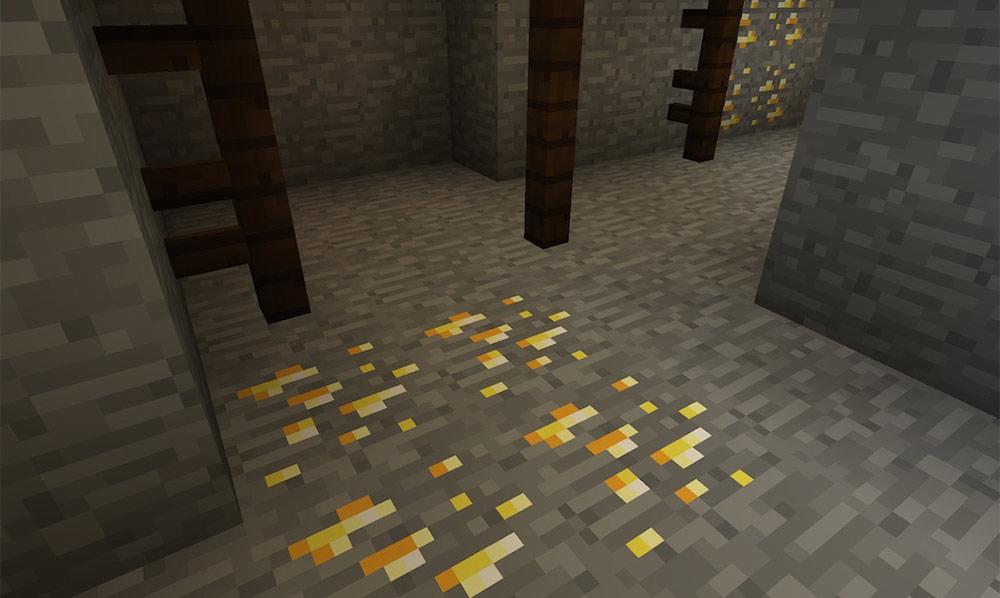
10. Gold is not as good as you think
Gold is semi-rare in Minecraft and should be mined, but it is a soft metal and no good for weapons and armour. Save it to create powered mine rails to race around the map.
11. Get there faster
By double-tapping up/forwards on the controller, you can do a speed run, which, when combined with jumping is a faster way to travel.
12. Fast travel for lazy people
By laying mine cart tracks you can use minecarts to zip across the landscape easily and quickly. On easy mode the mine carts also have little or no issue going uphill as well as down so you can circumnavigate your world with ease.
13. Tactical suicide
Making a substantial marker tower requires it to be tall… very tall. Make sure you have put all valuable items in a box and have a spawn point nearby (a bed that you have previously slept in). Then take a lot of dirt or cobblestone and a few torches. Look down and jump up placing a block underneath you each time. This will elevate you to a ridiculous height and you can place a torch or two at the top to act as a map marker for safe houses, mines or temples. Getting down will kill you unless you land in water so once you have had a good look around leap to your doom.
14. Hot stuff
When going down mines remember to take an iron bucket. Before returning to the surface bring back a bucket of lava to pour into water. This creates obsidian which can be used for creating a nether portal.
15. Diamond is lava’s best friend
Always look underneath diamond as in many cases there is lava underneath.
16. Farming Islands
When farming, find a small pool and place a dirt island in the centre (keeping a channel of water around the outside). Use a hoe to treat the ground and plant wheat seeds for a constant supply of wheat. Wheat makes bread which restores lots of energy and can be used to lure cows and sheep into pens.
17. Keeping cows
As you get deeper into the game you will want to keep a steady supply of food around as starving can cause death. Use wheat to lure two cows into a pen and feed them wheat to breed them. The more cows you have the more food you can make (without having to go too far from base).
18. Listen, can you smell something?
When digging down, listen out for enemy sounds as this help identify nearby caverns. When you hear the chirp of a spider or moan of a zombie, try digging sideways in a few directions to locate them.
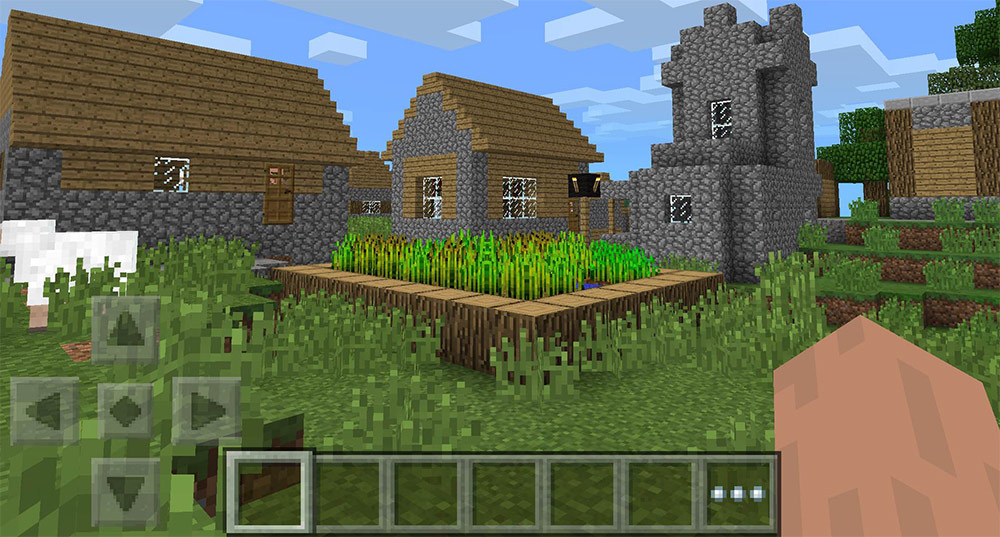
19. Get Minecraft Pocket Edition
This will give you twice as much game time but one can be used to learn what things do and experiment and the other can be your main game.
20. Don’t blow your diamonds on a hoe
his is an important life lesson in general. A wooden hoe works just as good as a diamond one. Diamonds are better used for pickaxes, swords and enchantment tables. Bonus tip: it’s easy to get addicted… Set yourself a mission or task and stick to it… You can lose hours, days and months in this game!
Common Beginner Mistakes and How to Avoid Them
Fatal Errors
1. Digging Straight Down
- Why it’s bad: Lava, ravines, cave systems
- Solution: Staircase mining or 2×1 shaft
2. Forgetting Bed Coordinates
- Why it’s bad: Losing base location
- Solution: Screenshot (F2) or write down coords (F3)
3. Carrying All Valuables
- Why it’s bad: Lose everything on death
- Solution: Store valuables, carry essentials
4. Ignoring Creeper Sounds
- Why it’s bad: Explosive death and base damage
- Solution: Listen for “hiss,” sprint away
Efficiency Mistakes
1. Not Using Furnaces Efficiently
- Mistake: One item at a time
- Fix: Smelt while exploring, use coal blocks
2. Wasting Iron on Tools
- Mistake: Full iron tool set early
- Fix: Iron pickaxe only, stone for rest
3. Random Mining
- Mistake: No system, getting lost
- Fix: Branch mining at Y=11-16
4. Hoarding Useless Items
Fix: Organized storage, discard excess
Mistake: Keeping all dirt/cobblestone
Days 1-3: Establishing Security
Checklist:
- Permanent shelter built
- Bed placed and used
- Food source established
- Basic mine started
- Iron tools crafted
- Armor pieces crafted
Days 4-7: Resource Gathering
Mining Goals:
- 64+ iron ingots
- 10+ gold ingots
- 3+ diamonds (pickaxe priority)
- 128+ coal
- Locate lava pools
Farming Setup:
- 9×9 wheat farm
- Animal pens built
- 2+ cows captured
- Sugarcane located
- Tree farm started
Advanced Tips for Quick Progression
Efficient Mining Strategies
Branch Mining Method:
- Dig to Y=16 (check with F3)
- Create 2-high main tunnel
- Branch every 3 blocks
- Mine 20-30 blocks per branch
- Light thoroughly as you go
What You’ll Find at Each Level:
- Y=16 and below: Diamonds
- Y=48 and below: Iron (common)
- Y=32 and below: Gold, Redstone
- Y=0-16: All ores possible
- Y=-59 to -64: Most diamonds (1.20+)
Village Trading Basics
Finding Villages:
- Plains and desert biomes
- Follow paths between villages
- Listen for iron golem sounds
- Look for torch/lantern lights
Best Early Trades:
- Farmer: Emeralds for crops
- Librarian: Enchanted books
- Toolsmith: Diamond tools
- Weaponsmith: Diamond weapons
- Cleric: Ender pearls
Preparing for The Nether
Minimum Requirements
Before Entering Nether:
- Full iron armor minimum
- Iron pickaxe (multiple)
- 64+ building blocks
- Flint and steel
- 32+ food items
- Bow and arrows
- Water bucket (for Overworld)
Portal Building:
- Minimum: 4×5 obsidian frame
- Light with flint and steel
- Build shelter around portal
- Mark coordinates both sides
More Minecraft Tips For Beginners
Start with a beginner-friendly game mode like “Survival” or “Peaceful” mode.
Start with the basics: Learn the basics of the game by starting with the survival mode and completing the tutorial. You will need to gather resources, build a shelter and survive the first night
Gather resources as soon as possible, especially wood and coal.
Hit the trees: Punch trees to collect wood, which is one of the most important resources in the game. You will need to craft a wooden pickaxe to collect other resources.
Build a shelter before the first nightfall to protect yourself from monsters.
A roof over your head: Build a shelter to protect yourself from monsters at night. You can use any available resources like dirt or wood.
Use torches to light up your shelter and surrounding areas to keep monsters away.
Use torches: Use torches to light up your surroundings and prevent monsters from spawning.
Craft a crafting table to access more advanced crafting options.
To craft a crafting table in Minecraft, you need four wooden planks. Follow these steps:
- Open your inventory by pressing “E” on your keyboard.
- Gather four wooden planks. You can get them by chopping down a tree and converting the wood into planks.
- Arrange the planks in a 2×2 grid in your crafting menu. Place one wooden plank in each slot of the top two rows.
- Drag the crafting table item from the output box to your inventory.
Once you have crafted a crafting table, you can place it down in the world by right-clicking with it selected in your hotbar. This will allow you to access a 3×3 crafting grid to craft more advanced items.
Use a pickaxe to mine stone and other harder materials.
Make tools: Use your resources to craft tools like a pickaxe, axe, and shovel. These tools will help you gather resources more efficiently. You’ll start with a wooden one but then use harder materials to craft better versions.
Craft a furnace to smelt ore and cook food.
Craft a furnace: Craft a furnace to smelt ores and cook food. You will need cobblestone to craft a furnace.
Build a bed to set your spawn point and avoid getting lost.
A bed is made from wood and wool. Once you fall asleep in bed, this will be your spawn point or checkpoint if you die.
Use a sword to defend yourself against monsters and other players.
Swords kill enemies faster than axes and pick axes.
Create a farm to grow crops and breed animals.
Build a farm: Build a farm to grow crops and breed animals. You will need seeds and animals to start a farm.
Use a bucket to gather water and lava.
Use water and lava to your advantage: Use water to create a water elevator and lava to create traps for monsters.
Explore caves to find valuable resources like diamonds.
Mine at different levels: Mine at different levels to find different resources. You will find different ores and materials at different depths.
Use a bow and arrows to fight monsters and hunt animals from a distance.
To create a bow and arrow in Minecraft, you will need three sticks and three strings. Follow these steps:
- Gather three sticks by punching wooden blocks (logs, planks, or stripped logs) with no tool or by using an ax, pickaxe, or shovel.
- Gather three strings by killing spiders or by finding them in abandoned mineshafts or dungeon chests.
- Arrange the sticks and strings in a “Y” shape in your crafting table or inventory crafting grid, with the sticks on either side of the top row and the string in the middle row. This will create a bow.
- Gather flint by mining gravel blocks with a shovel or by killing chickens, which may drop flint as a rare drop.
- Gather sticks by following step 1.
- Arrange the flint and sticks in a diagonal line in your crafting table or inventory crafting grid, with the flint in the top row and the sticks in the middle and bottom rows. This will create arrows.
- Equip your bow and arrows and use them to shoot at your target by holding down the right mouse button to draw back the bowstring and release it to fire the arrow.
Build a minecart system to transport yourself and your items quickly.
To build a minecart system in Minecraft, follow these steps:
- Gather resources: You’ll need iron ingots, sticks, and redstone dust.
- Craft the minecart tracks: Use iron ingots to craft minecart tracks in a crafting table.
- Place the tracks: Place the tracks in a straight line or in a loop. Make sure there are no gaps in the track.
- Add powered rails: Add powered rails every few blocks to keep the minecart moving. To power the rails, place a redstone torch or lever next to the rail.
- Add a minecart: Place a minecart on the track and push it to start.
- Build stations: Build stations along the track where you can get on and off the minecart.
- Add storage: You can add chests or hoppers to the stations to store items or transport them along the track.
- Add switches: You can add switches to the track to change the direction of the minecart.
- Test the system: Test your minecart system to make sure it works properly. You can ride the minecart or push it to see how it moves along the track.
Use redstone to create complex contraptions and automated systems.
Redstone is hard to find but when mined can be used to create power to power everything from doors to minecarts.
Trade with villagers to acquire rare and valuable items.
If you come across a village, you can trade with them instead of stealing from them. This will give you access to additional items.
Create an enchantment table to enchant your weapons and tools for extra abilities.
To create an enchantment table in Minecraft, you will need:
- 4 obsidian blocks
- 2 diamonds
- 1 book
Once you have gathered the necessary materials, follow these steps:
- Arrange the obsidian blocks in a square formation on the ground, leaving the center block empty.
- Place the two diamonds in the top two corners of the obsidian square.
- Place the book in the center block.
Once you have completed these steps, the enchantment table will appear, and you can use it to enchant weapons, tools, and armor.
Conclusion
Starting Minecraft can feel overwhelming, but remember: every expert was once a beginner who died to their first zombie. Focus on surviving your first few nights, then gradually expand your skills. The beauty of Minecraft lies in its flexibility—there’s no “wrong” way to play. Whether you become a master builder, redstone engineer, or adventure seeker, these fundamentals will serve as your foundation. Now grab your pickaxe, watch out for creepers, and welcome to the blocky adventure of a lifetime!
Latest
-

Summertime CHERRY Promo
-
Preview: Wheel World | Out This Month
-
Review: Blades of Fire | Xbox
-
Rogue Trooper Movie Unveils First Images
-
Classic Shooter ‘Painkiller’ Returns This October
-
Little Nightmares III: The Spiral Awaits | October
-
Flock Off! Preview
-
Section 13: Corporate Horror Twin-Stick Shooter


Lost Gems
-
Top 10 Meta Quest 2 Games For Children
-
Stormforce Gaming & The Prism iCue 6209
-
Licensed Xbox Games for Kids 2022/23
-
New Mods for Minecraft Bedrock 2023
-
The 6,6,6 Scariest Games of 2022
-
5 Great Udemy Courses For New Game Developers
-
Hearthstone Alternatives For Lovers of Card Games
-
My Top 10 Star Wars Games of All Time
-
5 of the Most Interesting Mobile Games at EGX Rezzed
-
11 Wicked Witches in Video Games | Halloween Special
-
Beginners Guide to Pokemon Go [Updated]
-
Advanced 2D and 3D Game Development Software
-
My Top 5 Boxing Games
-
Parents Guide to Minecraft
-
10 Great Kids Games From 2016 on Xbox One


You must be logged in to post a comment Login