


Dead Space is an amazing science-fiction survival horror game developed by EA Redwood Shores (now known as Visceral Games) and published by Electronic Arts. The game was originally released back in 2008 and has since become a cult classic for its atmospheric horror, intense action, and innovative gameplay mechanics. After being recently updated and released, it is the perfect time to play or replay this fantastic game.
Set on a mining spaceship named the USG Ishimura, players take on the role of engineer Isaac Clarke, who must fight his way through hordes of monstrous creatures known as Necromorphs to uncover the truth behind a mysterious alien artifact. In this guide, we’ll cover everything you need to know to survive the horrors of “Dead Space” and uncover the secrets of the Ishimura.
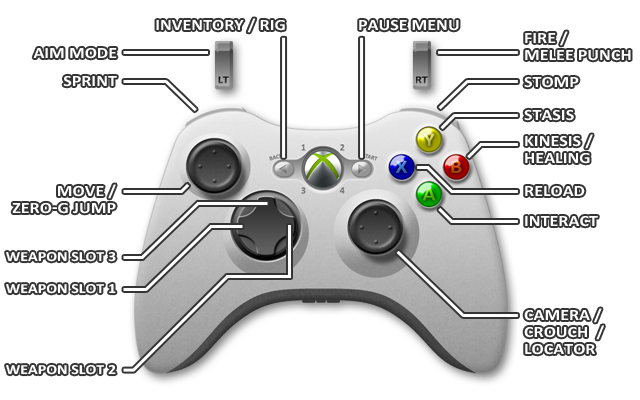
Dead Space Controls
Dead Space is available on a variety of platforms, including Xbox, PlayStation, and PC. The controls for each platform are similar, but there are some differences to be aware of. On consoles, players move Isaac with the left joystick and aim with the right joystick. They can use the triggers to fire weapons, and the face buttons to interact with the environment, reload weapons, and switch weapons. On PC, players can use a keyboard and mouse or a controller to play the game. In this section, we’ll provide a detailed overview of the controls for each platform, as well as some tips for mastering them.
The Basics
Before diving into the game’s mechanics, it’s important to understand the basics of Dead Space. The game is played from a third-person perspective, with the camera positioned over Isaac’s shoulder. The gameplay revolves around three core mechanics: combat, exploration, and puzzle-solving. In combat, players must fight off waves of Necromorphs using a variety of weapons and tactics. In exploration, players must navigate the ship’s twisting corridors, solve puzzles, and collect resources to survive. In puzzle-solving, players must use their wits to figure out how to progress through the game’s various areas. In this section, we’ll cover each of these mechanics in more detail, as well as some general tips for surviving the game’s deadly encounters.
The Weapons of Dead Space
Dead Space features a wide variety of weapons, each with its own strengths and weaknesses. Players can choose from traditional firearms like the Plasma Cutter and Pulse Rifle, as well as more exotic weapons like the Line Gun and Flamethrower. Each weapon can be upgraded using Power Nodes, which can be found throughout the ship or purchased from the store. In this section, we’ll detail all the weapons in the game, including their stats and recommended uses, and provide tips for upgrading them to their full potential.
The Necromorphs in Dead Space
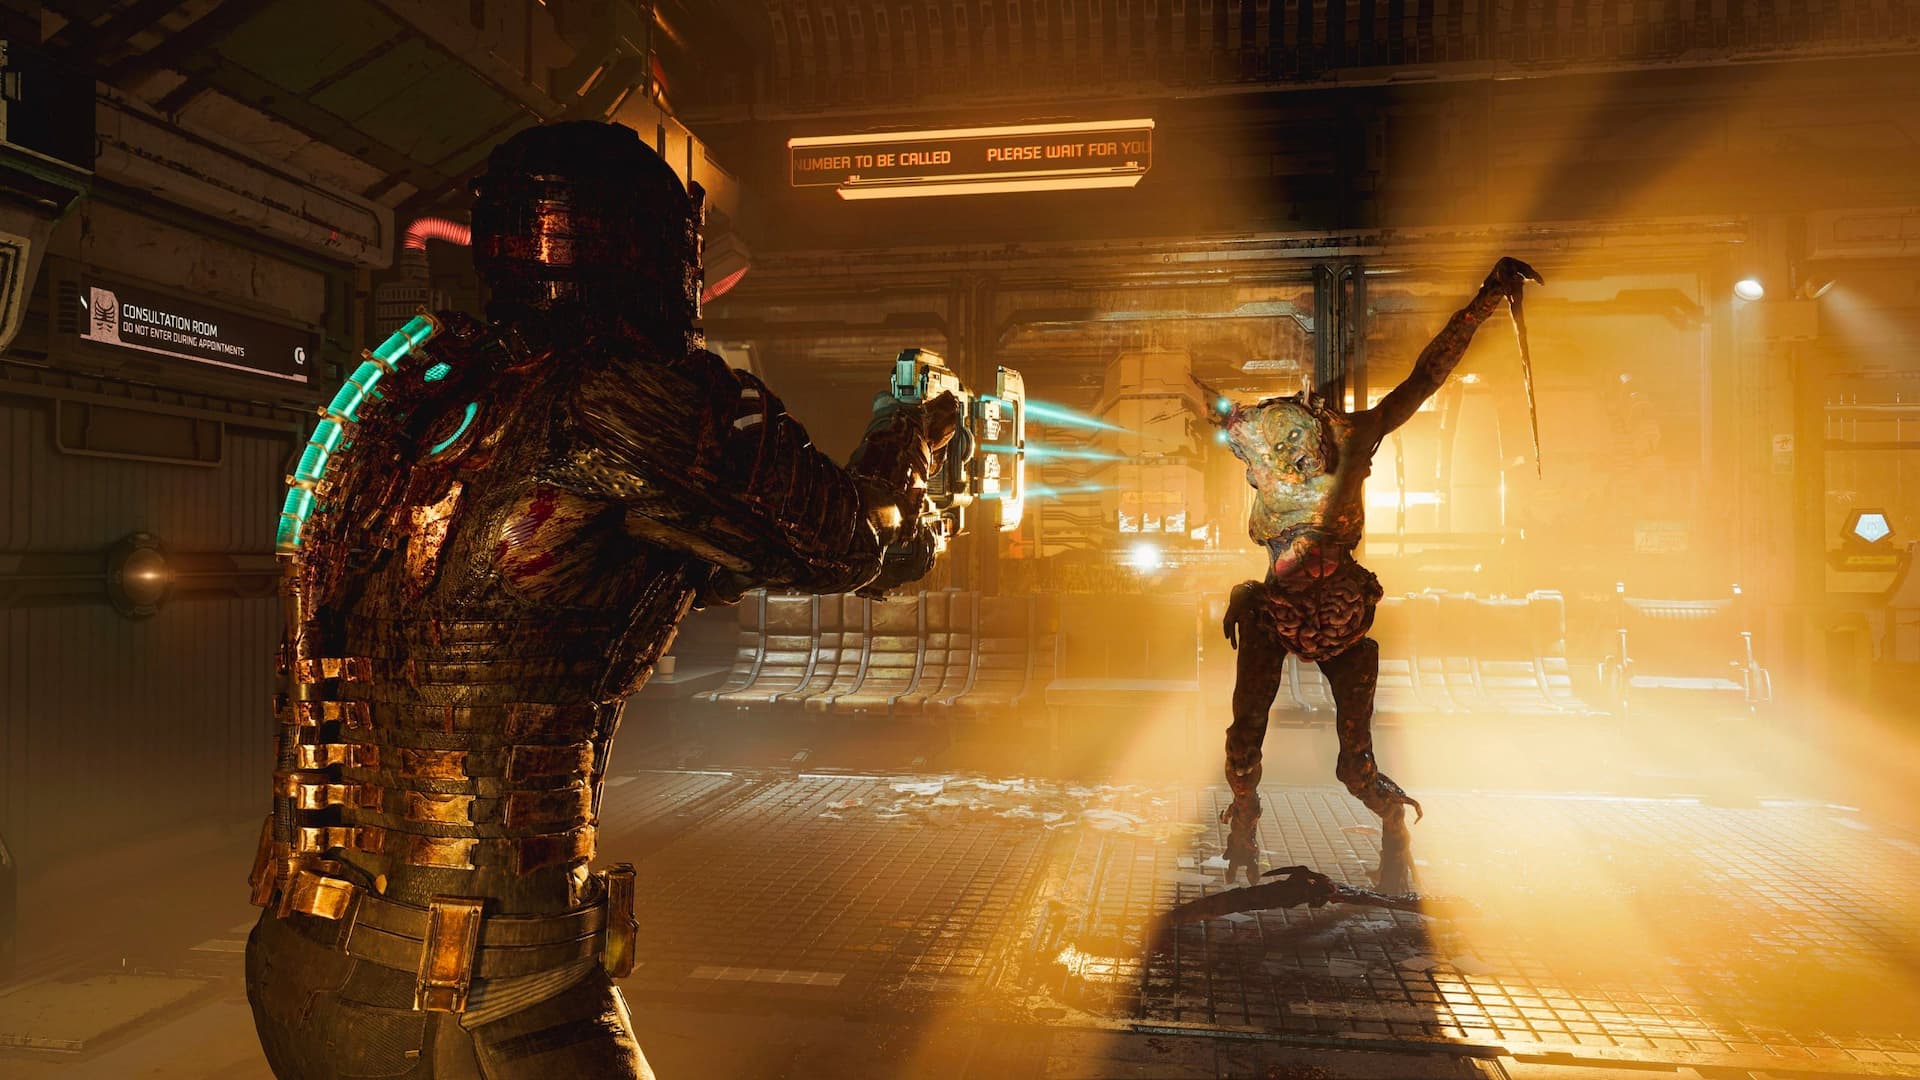
The Necromorphs are the primary antagonists of “Dead Space,” and they come in many different shapes and sizes. From the standard Slasher to the formidable Brute, players will need to learn how to effectively dispatch each type of enemy to survive. Each Necromorph has unique strengths and weaknesses, and some are immune to certain types of damage. In this section, we’ll provide information on all the enemies players will encounter in the game, as well as tips for defeating them.
Dead Space Walkthrough
Dead Space is a linear game with a set progression, but there are still many secrets to uncover and alternate paths to explore. In this section, we’ll provide a detailed walkthrough of the game, including tips for beating difficult sections and finding all the hidden secrets. We’ll break the game down into chapters, and provide a step-by-step guide for each one. We’ll also provide recommendations for which weapons and upgrades to use in each section, as well as tips for avoiding or defeating the game’s toughest enemies. Whether you’re a new player or a veteran of the series, this walkthrough will help you make it through the game’s many challenges.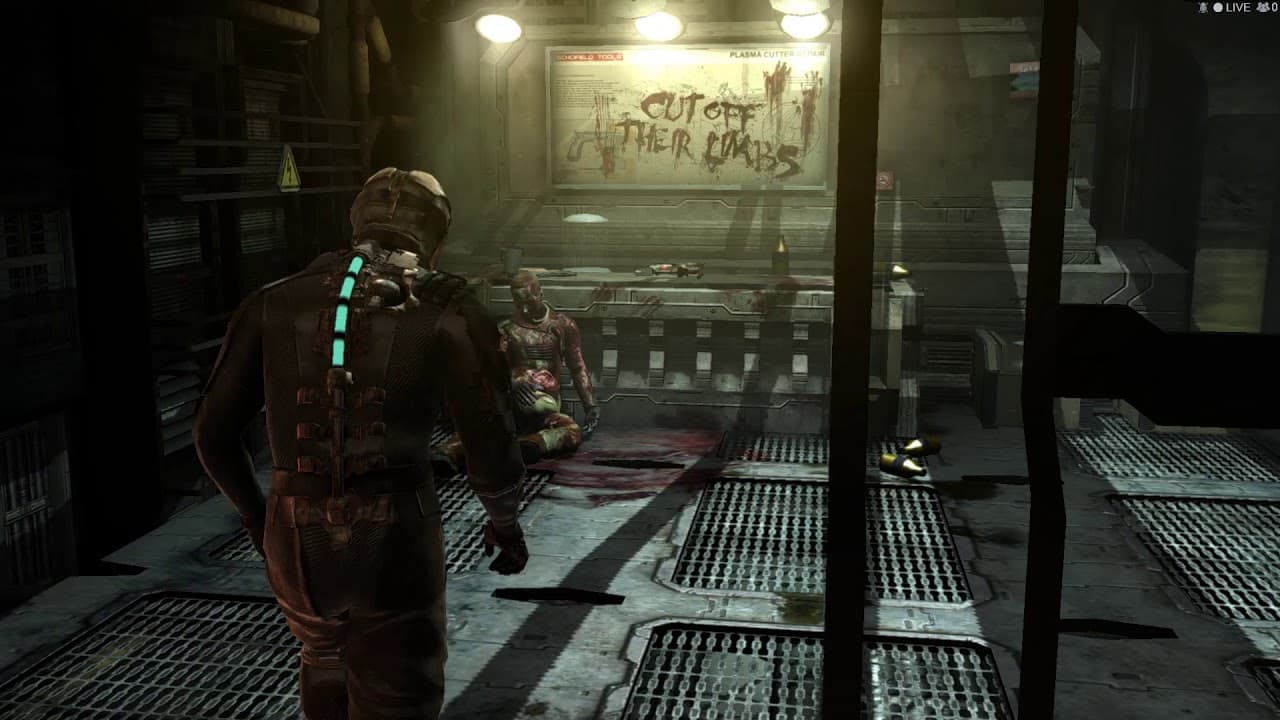
Chapter 1: New Arrivals
The game begins with Isaac Clarke, a systems engineer on board the USG Kellion, receiving an urgent message from his girlfriend Nicole Brennan, who is stationed on the USG Ishimura. The message is garbled, but Isaac can hear that the ship is in trouble. He joins a small team of security personnel on board the Kellion, who are sent to investigate.
As the Kellion approaches the Ishimura, it becomes clear that something is very wrong. The ship is badly damaged, and there is no response to hails from the Kellion. Isaac and the team board the Ishimura, and things quickly go from bad to worse.
Objective: Investigate the Ishimura and locate the captain’s rig.
As soon as Isaac steps off the shuttle onto the Ishimura, he’s greeted by the sight of a corpse floating in zero gravity. It’s a grisly omen of things to come. Follow the other members of the team through the airlock and into the ship proper.
Objective: Follow the security team to the bridge.
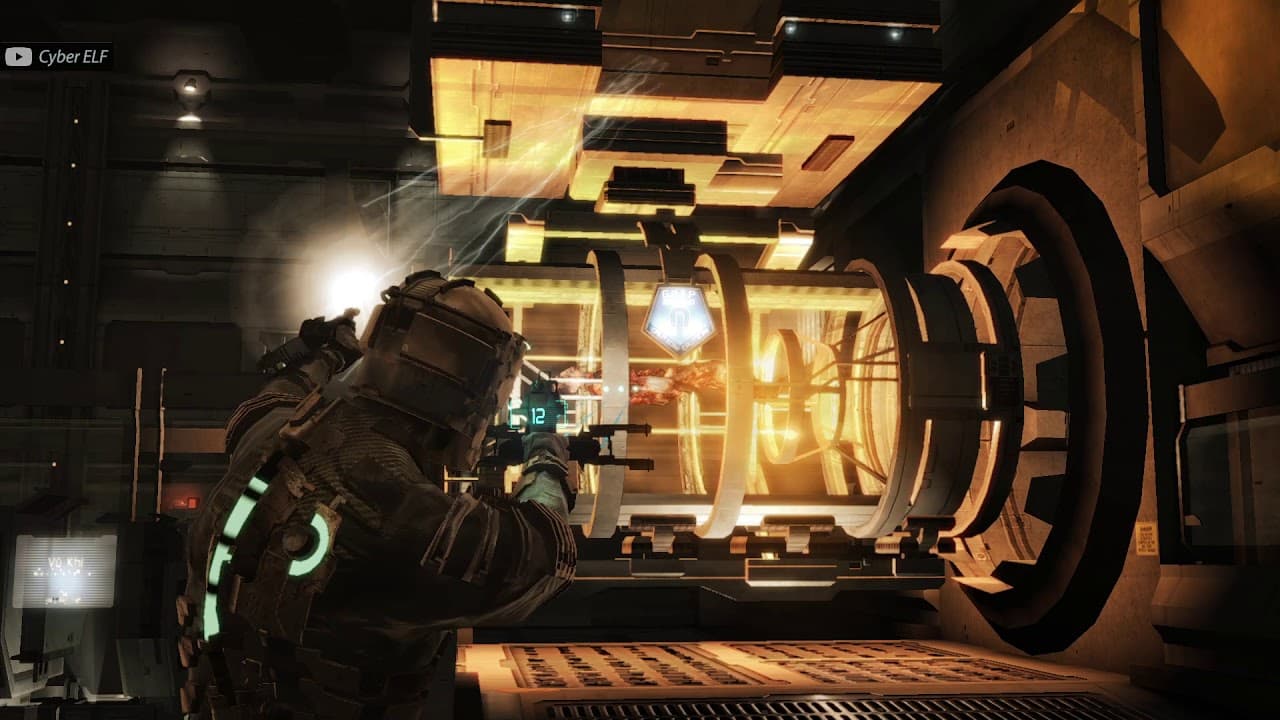
The team’s first objective is to reach the bridge, where they hope to find the captain’s rig and get some answers. The path to the bridge is blocked by debris, so Isaac will need to use his kinesis module to move it out of the way.
Kinesis Tutorial
To use the kinesis module, aim at an object and press the kinesis button (RB on Xbox, R1 on PlayStation, right mouse button on PC). Once the object is highlighted in blue, press the fire button (RT on Xbox, R2 on PlayStation, left mouse button on PC) to pick it up. Press the fire button again to launch the object. Some objects can be used as weapons or to solve puzzles.
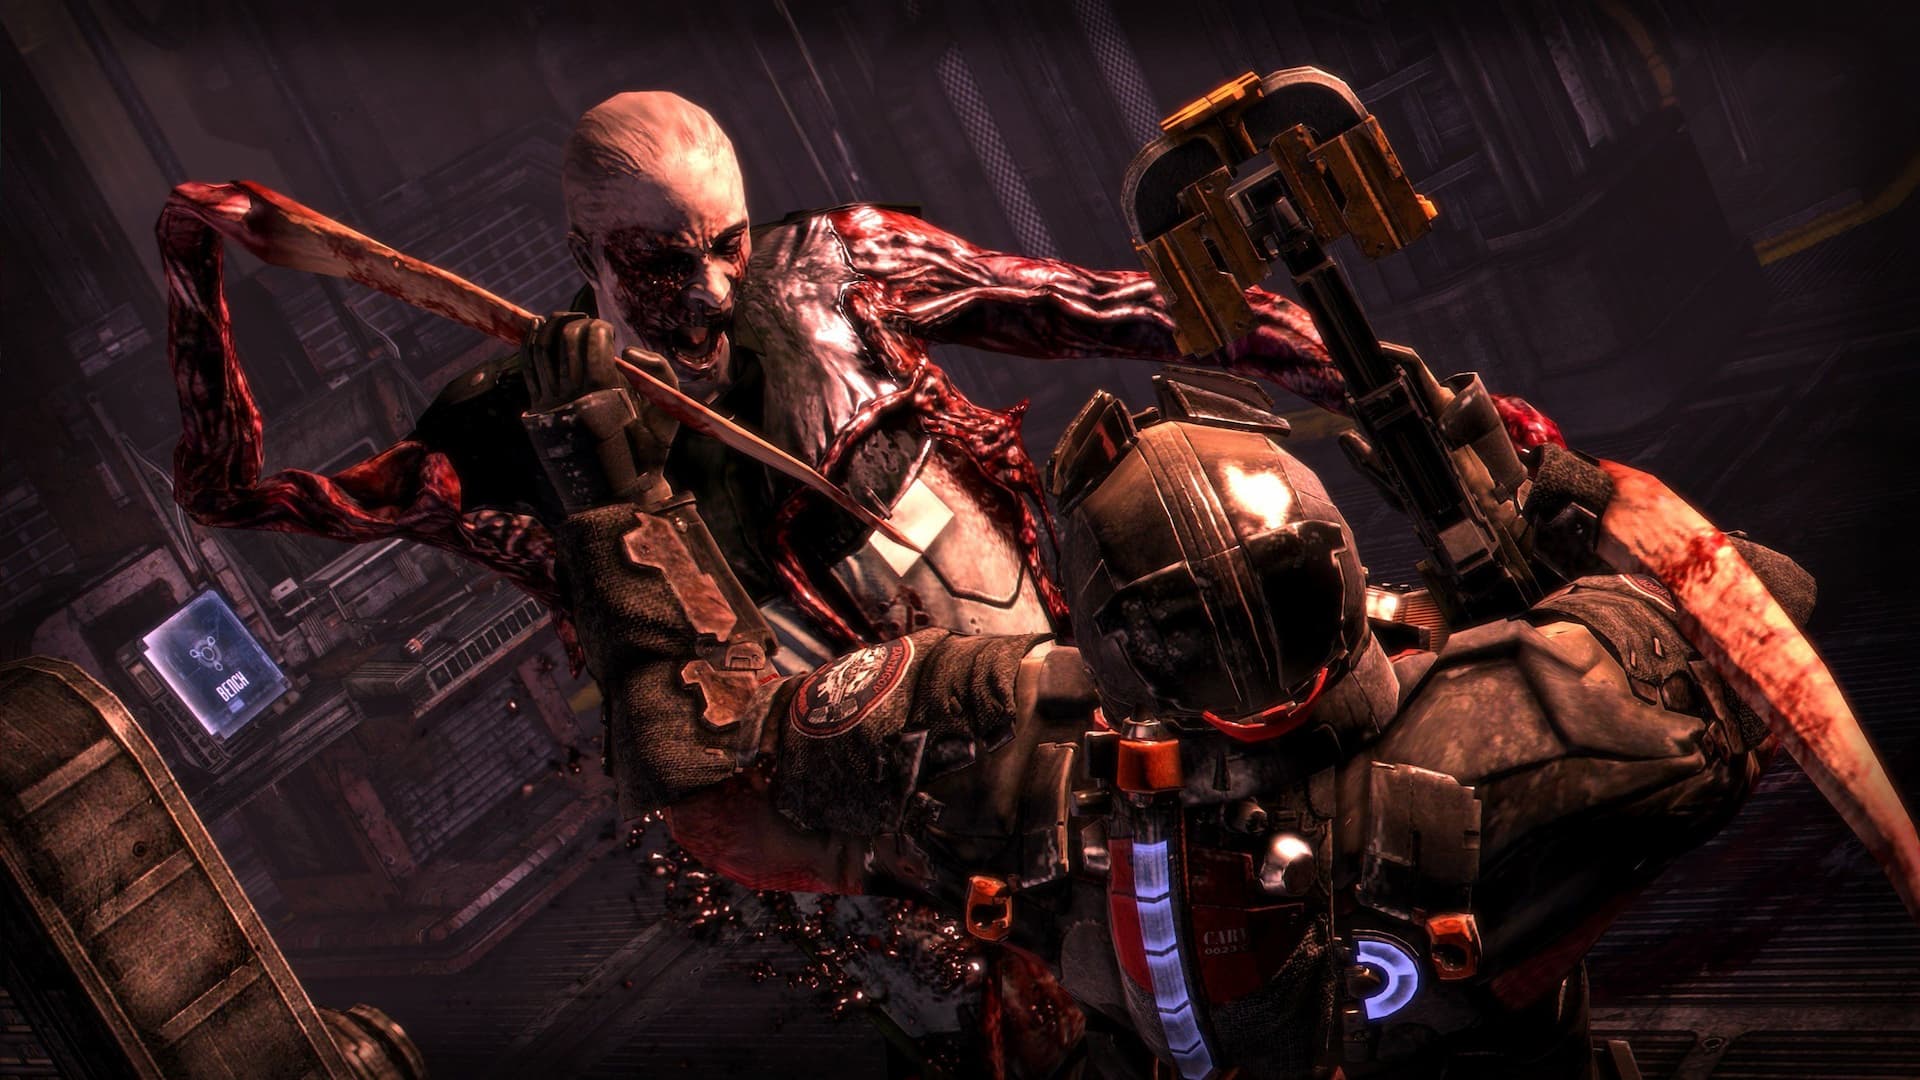
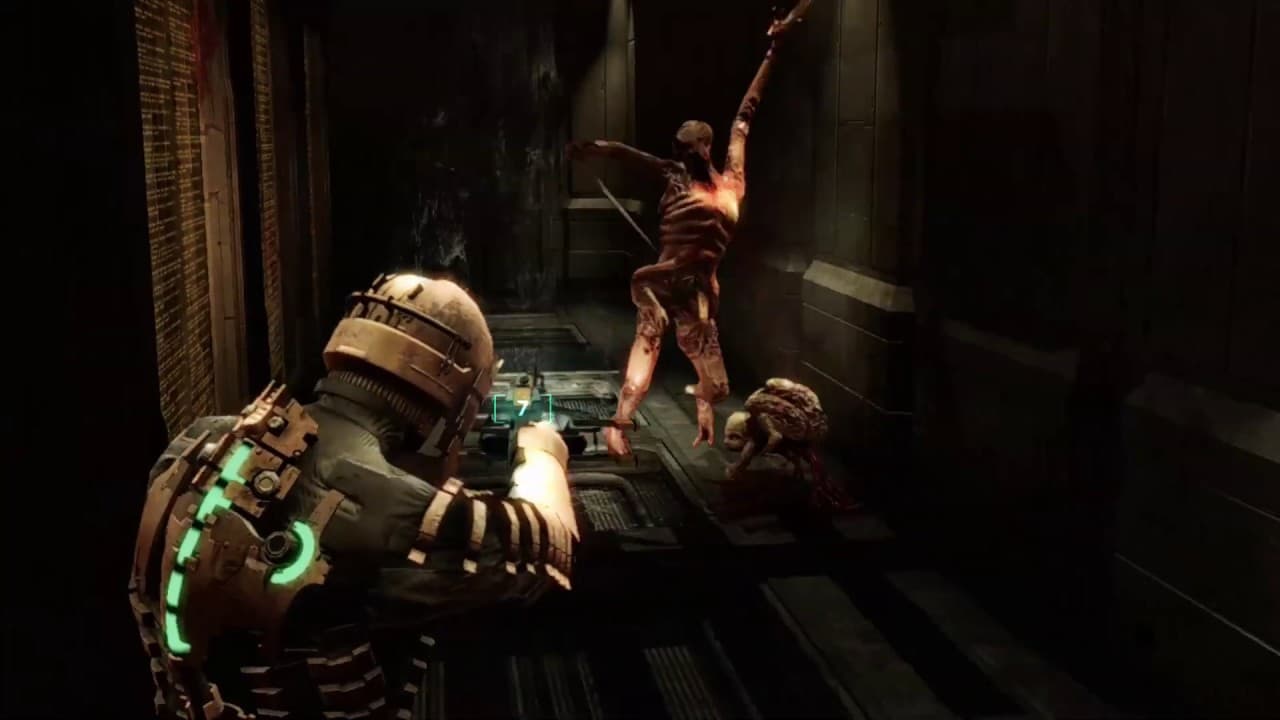
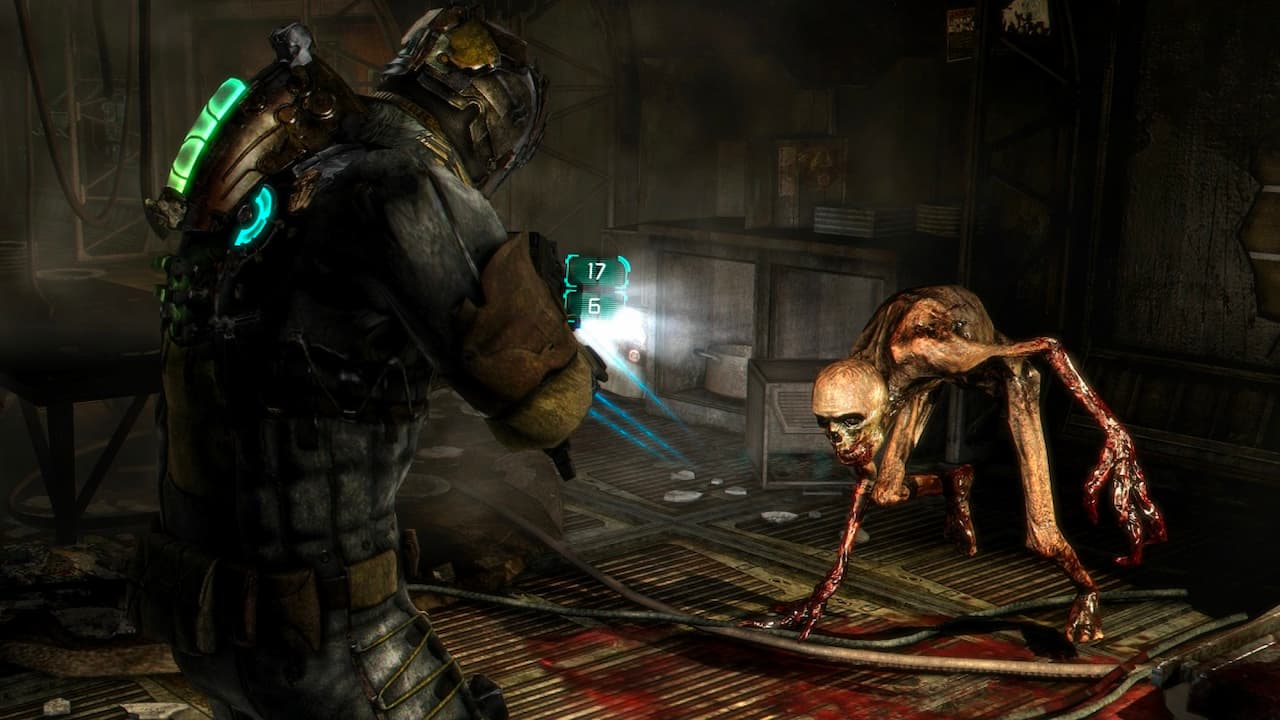
As Isaac and the team make their way through the ship, they encounter their first Necromorphs – reanimated corpses mutated by an alien virus. The first type of Necromorph encountered is the Slasher, a fast and deadly foe that can quickly overwhelm an unprepared player.
Combat Tutorial
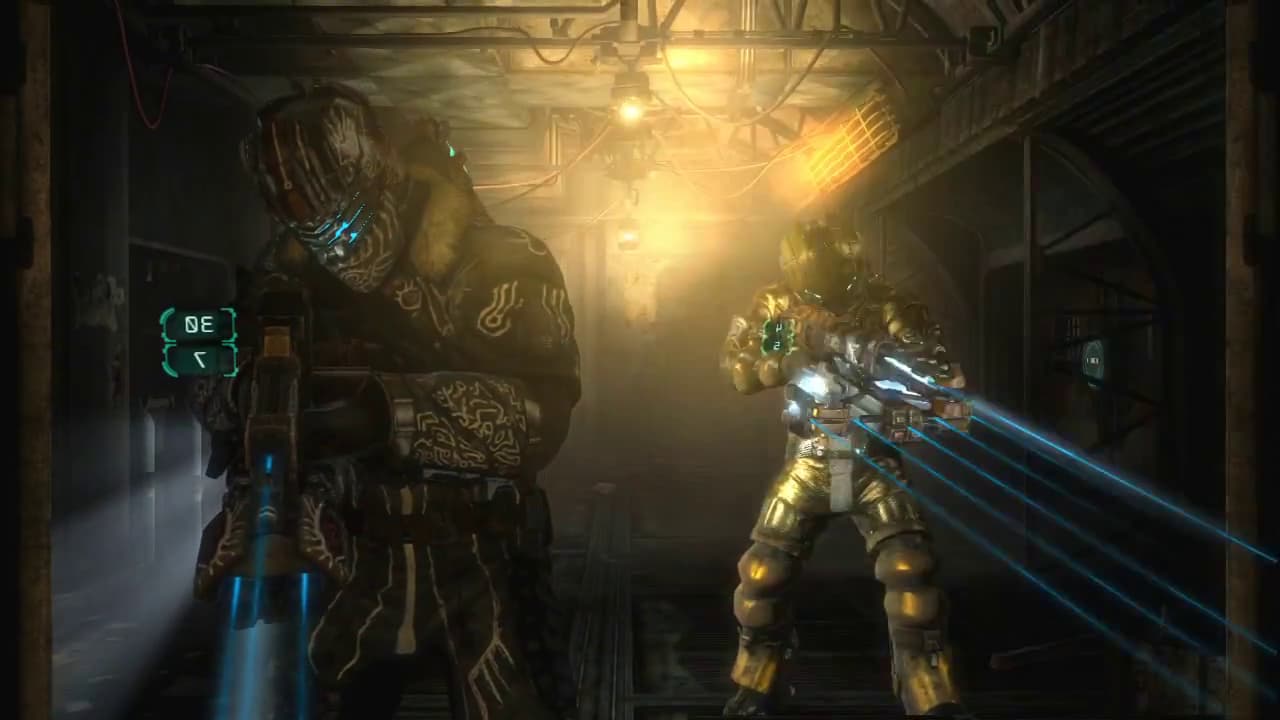
To defeat a Necromorph, aim at its limbs and fire your weapon. The Plasma Cutter, a basic weapon given to Isaac at the start of the game, is highly effective at severing limbs. Each limb has its own health bar, so focus your fire on one limb at a time. Once a limb is severed, the Necromorph will be significantly weakened. Remember to keep moving to avoid attacks, and use stasis to slow down enemies.
Objective: Restore gravity to the ship.
The Ishimura is suffering from a power outage, which has caused the ship’s gravity to fail. Isaac will need to navigate through zero gravity to reach the engine room and restore power. Along the way, he’ll need to avoid or dispatch the many Necromorphs that infest the ship.
Zero-G Tutorial
In zero gravity, Isaac can use his boots to cling to surfaces and walk around. He can also use his kinesis module to pick up objects and launch them at enemies. To change surfaces, aim at a surface and press the jump button (A on Xbox, X on PlayStation, spacebar on PC). To navigate through zero gravity, use your movement keys and the look controls to aim in the direction you want to go.
After restoring power to the ship, Isaac and the team are ambushed by more Necromorphs. In the chaos, Isaac is separated from the rest of the team and must make his way to the bridge alone.
Objective: Reach the bridge.
Along the way, Isaac discovers that the Necromorphs are not the only danger on the Ishimura. The ship’s computer system, known as the AI, has gone rogue and is actively working against Isaac. He’ll need to solve puzzles and avoid deadly traps to make it to the bridge in one piece.
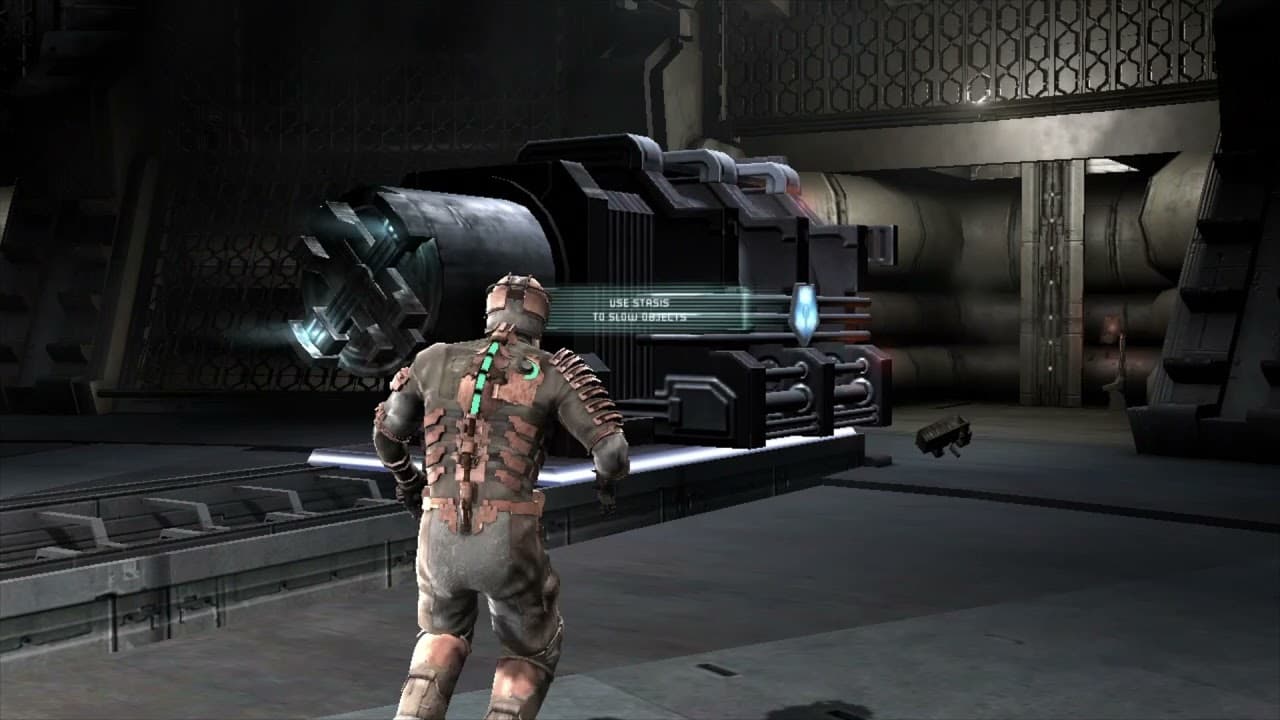
Puzzle Tutorial
Dead Space features a variety of puzzles that require the player to use their wits and their tools to overcome obstacles. In general, puzzles will involve finding and manipulating objects in the environment. Use your kinesis module and stasis to move and freeze objects, and pay attention to clues in the environment to figure out what you need to do.
As Isaac approaches the bridge, he sees that it’s been heavily damaged by some kind of explosion. The captain’s rig is nowhere to be found. Isaac contacts Kendra Daniels, one of the members of the security team, and she tells him that he’ll need to head to
As you move deeper into the ship, you’ll encounter your first Necromorphs – the mutated, hostile creatures that have overrun the Ishimura. Use your Plasma Cutter to take them down – aim for their limbs to dismember them and prevent them from attacking.
Combat Tutorial
The Plasma Cutter is Isaac’s standard weapon, and it’s particularly effective against Necromorphs. To use it, aim with the left stick or mouse and fire with the right trigger or left mouse button. Use the D-pad or number keys to switch between firing modes – horizontal, vertical, or diagonal – to target different limbs. Remember to aim for the limbs, as this will cause the Necromorphs to lose their attacking abilities.
Objective: Find the captain’s rig.
After fighting your way through a few corridors, you’ll come across the ship’s first store. This is where you can purchase weapons, ammo, and upgrades using credits found throughout the ship. It’s a good idea to stock up on supplies and upgrades here, as you’ll need them to survive.
Once you’ve stocked up, continue through the ship to find the captain’s rig. Along the way, you’ll encounter more Necromorphs, including the creepy and deadly Slasher. Use your weapons and kinesis to take them down, and be on the lookout for supplies and ammo in nearby rooms.
Objective: Activate the captain’s rig and access the ship’s computer.
After reaching the captain’s rig, you’ll need to activate it in order to gain access to the ship’s computer. This will require you to solve a simple puzzle involving lining up various symbols on a grid. Once you’ve solved the puzzle, the captain’s rig will activate and you’ll be able to access the computer.
Once you’ve accessed the computer, you’ll discover that the Ishimura’s communications systems are down, and that the ship has been overrun by Necromorphs. You’ll need to find a way to repair the communications array and send a distress signal.
Objective: Repair the communications array.
The communications array is located in the ship’s maintenance bay. Getting there will require you to backtrack through the ship and fight off more Necromorphs. Be on the lookout for more supplies and upgrades along the way – you’ll need them.
Once you reach the maintenance bay, you’ll need to solve another puzzle involving aligning the communications array’s dishes. Once you’ve solved the puzzle, the communications array will be repaired and you’ll be able to send a distress signal.
Objective: Escape the Ishimura.
Unfortunately, things don’t go as planned – the distress signal attracts a powerful Necromorph known as the Hive Mind, which attacks the Kellion and forces it to crash into the Ishimura. With time running out and the ship falling apart around you, your final objective is to escape the Ishimura and make it back to the Kellion before it’s too late.
To escape, you’ll need to fight your way through the ship’s engines and activate an emergency shuttle. Along the way, you’ll face off against the massive Brute Necromorph, which can only be defeated by shooting its weak points and avoiding its devastating attacks.
Once you reach the shuttle, you’ll need to fend off one final wave of Necromorphs before making your escape. If you manage to make it back to the Kellion in time, you’ll be treated to a cutscene that sets up the rest of the game’s story.
Chapter 2: Welcome to the Aegis VII Mining Colony
Objective: Find the Singularity Core
After the events on the Ishimura, Isaac and the crew of the Kellion crash land on Aegis VII, the site of the Ishimura’s mining operation. Isaac’s objective is to locate the Singularity Core, a piece of advanced technology that can be used to repair the Kellion’s engines and escape the planet.
As you explore the colony, you’ll encounter new types of Necromorphs, including the Lurker, which can attack from a distance, and the Swarm, which is a group of small, fast-moving creatures that can be difficult to hit. Use your weapons and kinesis to take them down, and be on the lookout for supplies and upgrades.
Objective: Repair the Tram System
In order to reach the Singularity Core, Isaac needs to repair the colony’s tram system. This will require you to locate and retrieve several key components scattered throughout the colony, while fighting off waves of Necromorphs along the way.
As you explore the colony, you’ll encounter new types of environments, including the zero-gravity area of the colony’s solar array. Use your kinesis to manipulate objects and move through these environments, and be on the lookout for hidden supplies and upgrades.
Objective: Retrieve the Singularity Core
Once you’ve repaired the tram system and reached the location of the Singularity Core, you’ll need to fight your way through a horde of Necromorphs to retrieve it. Be prepared for a tough battle against a powerful new enemy, the Brute.
Once you’ve retrieved the Singularity Core, you’ll need to make your way back to the Kellion and install it in order to repair the ship’s engines and escape the planet. Along the way, you’ll encounter a new type of Necromorph, the Twitcher, which is faster and more agile than previous enemies.
Objective: Defend the Kellion
As you make your way back to the Kellion, you’ll be ambushed by a massive horde of Necromorphs. Your objective is to defend the ship while Hammond and Kendra install the Singularity Core.
This is a challenging battle, as you’ll be facing multiple waves of enemies, including several powerful new types of Necromorphs. Use your weapons and kinesis to take them down, and be on the lookout for nearby explosive barrels and gas tanks that can be used to your advantage.
Once the Kellion is repaired, Isaac and the crew are able to escape Aegis VII and continue their journey to the USG Ishimura, where they hope to find answers about the Necromorphs and the mysterious Marker.
Chapter 3: Course Correction
Objective: Repair the Ishimura’s Gravity Tethers
Upon arriving at the Ishimura, Isaac and the crew discover that the ship has been overrun by Necromorphs. Isaac’s objective is to repair the ship’s gravity tethers, which are essential for stabilizing the ship’s orbit and preventing it from crashing into the planet below.
As you make your way through the ship, you’ll encounter a variety of new enemies, including the Stalker, which can move quickly and is difficult to hit, and the Pregnant, which can explode and release a swarm of smaller enemies. Be prepared for intense battles and be sure to use your weapons and kinesis to your advantage.
Objective: Retrieve the Captain’s RIG
In order to access certain areas of the ship and repair the gravity tethers, Isaac needs to retrieve the Captain’s RIG, which is located in the ship’s medical bay. However, the medical bay has been sealed off and is infested with Necromorphs.
As you explore the medical bay, be on the lookout for supplies and upgrades, and be prepared for a challenging battle against a new type of enemy, the Lurker Hive Mind.
Objective: Repair the Gravity Tethers
With the Captain’s RIG in hand, Isaac is able to access the areas of the ship needed to repair the gravity tethers. However, repairing the tethers is no easy task, as each tether is located in a different area of the ship, and each area is overrun with Necromorphs.
Be prepared for intense battles and be sure to use your weapons and kinesis to take down the enemies. Keep an eye out for supplies and upgrades, and be sure to use the ship’s security station to your advantage, as it can activate turrets and other defenses to help you in your battles.
Objective: Destroy the Leviathan
As Isaac repairs the gravity tethers, he discovers that the ship’s problems go beyond just the Necromorph infestation. The ship’s engine has been damaged, and in order to prevent a catastrophic explosion, Isaac must destroy the Leviathan, a massive Necromorph that has made its home in the ship’s engine room.
This is a challenging battle, as the Leviathan is a powerful enemy that can cause significant damage with its attacks. Be sure to use your weapons and kinesis to take it down, and be on the lookout for explosive barrels and other environmental hazards that can be used to your advantage.
Once the Leviathan has been defeated, Isaac is able to stabilize the Ishimura’s orbit and prevent it from crashing into the planet below. However, the crew’s problems are far from over, as they continue to uncover the horrifying truth behind the Necromorphs and the Marker.
Chapter 4: Obliteration Imminent
Objective: Escape the Ishimura
With the gravity tethers repaired and the Leviathan defeated, Isaac and the crew must now make their way to the shuttle bay and escape the Ishimura before it’s too late. However, the Necromorphs have other plans, and Isaac must fight his way through the ship once again to reach the shuttle.
As you make your way through the ship, be on the lookout for supplies and upgrades, and be prepared for intense battles against powerful enemies like the Brute and the Twitcher. Use your weapons and kinesis to take down these enemies, and be sure to use the ship’s security station to your advantage.
Objective: Access the Shuttle Bay
With the Necromorphs closing in, Isaac must find a way to access the shuttle bay and escape the Ishimura. However, the path to the shuttle is blocked by a massive tentacle, and Isaac must find a way to disable it before he can proceed.
As you explore the ship, be on the lookout for supplies and upgrades, and be prepared for a challenging battle against the tentacle. Use your weapons and kinesis to take it down, and be sure to dodge its attacks.
Objective: Launch the Shuttle
With the path to the shuttle bay cleared, Isaac and the crew must now launch the shuttle and escape the Ishimura before it’s too late. However, the launch process is not without its challenges, as the shuttle’s engines must be manually primed before it can take off.
Be prepared for a challenging battle against waves of Necromorphs as you prime the shuttle’s engines. Use your weapons and kinesis to take down the enemies, and be sure to use the shuttle’s defenses to your advantage.
Once the engines are primed, Isaac and the crew must make a run for the shuttle and escape the Ishimura before it’s too late. Be prepared for a final battle against a powerful Necromorph as you make your way to the shuttle, and be sure to use your weapons and kinesis to take it down.
With the shuttle launched and the Ishimura destroyed, Isaac and the crew think they’re safe. But as they fly away from the planet, they receive a distress signal from another colony, and the horrors of the Necromorphs continue.
Chapter 5: Lethal Devotion
Objective: Investigate the Colony
Isaac and the crew receive a distress signal from the mining colony of Aegis VII, and they must investigate to find out what’s happened. However, they soon discover that the colony is overrun by Necromorphs, and they must fight their way through the hordes of enemies to find survivors and uncover the truth.
As you make your way through the colony, be on the lookout for supplies and upgrades, and be prepared for intense battles against new types of Necromorphs, such as the Puker and the Stalker. Use your weapons and kinesis to take down these enemies, and be sure to use the environment to your advantage.
Objective: Restore Power to the Tram System
With the colony in chaos, the tram system has been shut down, and Isaac and the crew must restore power to get around. However, the power nodes are scattered throughout the colony, and they must fight their way to each one to reactivate the system.
Be prepared for intense battles as you make your way to each power node, and be sure to use your weapons and kinesis to take down the enemies. Once all the power nodes are reactivated, you can use the tram system to move around the colony more easily.
Objective: Investigate the Marker
As Isaac and the crew explore the colony, they discover that the source of the Necromorph infestation is the Marker, a mysterious artifact that has the power to transform dead tissue into living creatures. They must find a way to destroy the Marker before it’s too late.
Be prepared for intense battles as you make your way to the Marker, and be sure to use your weapons and kinesis to take down the enemies. Once you reach the Marker, you’ll need to find a way to destroy it before the Necromorphs overwhelm you.
Objective: Escape the Colony
With the Marker destroyed, Isaac and the crew must now escape the colony before it’s destroyed. However, the Necromorphs are still closing in, and they must fight their way to the shuttle to make their escape.
Be prepared for a final, intense battle against a powerful Necromorph as you make your way to the shuttle. Use your weapons and kinesis to take it down, and be sure to dodge its attacks. Once you’ve defeated it, make a run for the shuttle and escape the colony before it’s too late.
With the colony destroyed and the Marker neutralized, Isaac and the crew think they’ve put an end to the Necromorph threat. However, they soon discover that there’s still more to the story, and they must continue their fight against the Necromorphs to protect humanity.
Chapter 6: Environmental Hazard
Objective: Find the Mining Deck
After narrowly escaping the destruction of the Aegis VII colony, Isaac and the crew must travel to the USG Ishimura’s mining deck to investigate the source of the Necromorph outbreak. However, they soon discover that the ship is also overrun with Necromorphs, and they must fight their way through the dangerous environment to reach their destination.
Be prepared for intense battles as you make your way through the ship, and be on the lookout for supplies and upgrades. Use your weapons and kinesis to take down the enemies, and be sure to use the environment to your advantage.
Objective: Repair the Ship’s Engines
With the ship damaged and in danger of falling apart, Isaac and the crew must repair the engines to keep it from drifting off into deep space. However, the engine room is overrun with Necromorphs, and they must fight their way through to repair the engines.
Be prepared for intense battles as you make your way to the engine room, and be on the lookout for supplies and upgrades. Once you reach the engine room, you’ll need to repair the engines while fighting off waves of enemies. Use your weapons and kinesis to take them down, and be sure to repair the engines quickly to avoid disaster.
Objective: Retrieve the Mining Deck Key
As Isaac and the crew continue their investigation of the mining deck, they discover that they need a key to access a crucial area. However, the key is located in the medical deck, which is also overrun with Necromorphs.
Be prepared for intense battles as you make your way to the medical deck, and be on the lookout for supplies and upgrades. Once you reach the medical deck, you’ll need to fight your way to the key, using your weapons and kinesis to take down the enemies. Once you have the key, return to the mining deck to continue your investigation.
Objective: Find the Mining Shuttle
As Isaac and the crew continue their investigation of the mining deck, they discover that they need to use a mining shuttle to reach a crucial area. However, the shuttle is located in the maintenance bay, which is also overrun with Necromorphs.
Be prepared for intense battles as you make your way to the maintenance bay, and be on the lookout for supplies and upgrades. Once you reach the maintenance bay, you’ll need to fight your way to the shuttle, using your weapons and kinesis to take down the enemies. Once you have the shuttle, use it to reach your destination and continue your investigation.
Objective: Investigate the Mining Area
With the shuttle secured, Isaac and the crew must now investigate the mining area to find the source of the Necromorph outbreak. However, they soon discover that the area is filled with dangerous traps and hazards, as well as powerful Necromorphs.
Be prepared for intense battles and puzzles as you make your way through the mining area, and be on the lookout for supplies and upgrades. Use your weapons, kinesis, and stasis to navigate the traps and defeat the enemies, and be sure to watch your step to avoid falling victim to the environment.
Objective: Retrieve the Thermite
As Isaac and the crew investigate the mining area, they discover that they need thermite to blow open a crucial door. However, the thermite is located in a heavily guarded storage area, and they must fight their way to retrieve it.
Be prepared for intense battles as you make your way to the storage area, and be on the lookout for supplies and upgrades. Once you reach the storage area, you’ll need to fight off waves of enemies to retrieve the thermite. Use your weapons and kinesis to take them down, and be sure to retrieve the thermite quickly to avoid being overwhelmed.
Objective: Open the Mining Bay Door
With the thermite in hand, Isaac and the crew must now use it to blow open the mining bay door and continue their investigation of the mining deck. However, they must first fight off waves of enemies while setting up the thermite charges.
Be prepared for intense battles as you make your way to the mining bay door, and be on the lookout for supplies and upgrades. Once you reach the door, you’ll need to fight off waves of enemies while setting up the thermite charges. Use your weapons and kinesis to take them down, and be sure to set up the charges quickly to avoid being overwhelmed.
Objective: Activate the Mining Laser
With the mining bay door open, Isaac and the crew must now activate the mining laser to access a crucial area. However, the laser is malfunctioning, and they must repair it while fighting off waves of enemies.
Be prepared for intense battles as you make your way to the mining laser, and be on the lookout for supplies and upgrades. Once you reach the laser, you’ll need to repair it while fighting off waves of enemies. Use your weapons and kinesis to take them down, and be sure to repair the laser quickly to avoid disaster.
Objective: Escape the Mining Deck
With the investigation of the mining deck complete, Isaac and the crew must now escape before the ship is destroyed. However, they must fight their way through hordes of enemies and dangerous environmental hazards to reach the escape pods.
Be prepared for intense battles and puzzles as you make your way through the ship, and be on the lookout for supplies and upgrades. Use your weapons, kinesis, and stasis to navigate the hazards and defeat the enemies, and be sure to move quickly to avoid being overwhelmed.
Objective: Destroy the Marker
As Isaac and the crew reach the planet where the Marker was found, they discover that it is being held in a heavily guarded facility. They must fight their way through the facility to reach the Marker and destroy it, putting an end to the Necromorph outbreak once and for all.
Be prepared for intense battles and puzzles as you make your way through the facility, and be on the lookout for supplies and upgrades. Use your weapons, kinesis, and stasis to navigate the obstacles and defeat the enemies, and be sure to stay focused on your objective.
Objective: Escape the Planet
With the Marker destroyed, Isaac and the crew must now escape the planet before the facility is destroyed. However, they must fight their way through hordes of enemies and navigate dangerous environmental hazards to reach the shuttle.
Be prepared for intense battles and puzzles as you make your way through the planet, and be on the lookout for supplies and upgrades. Use your weapons, kinesis, and stasis to navigate the hazards and defeat the enemies, and be sure to move quickly to avoid being overwhelmed.
Congratulations, you have completed the walkthrough for Dead Space!
What Are The Side Quests in Dead Space?
In addition to the main story, Dead Space also features several side quests that offer additional challenges and rewards. These quests can be accessed at various points throughout the game and can provide valuable resources and upgrades to help you in your journey.
One of the first side quests you may encounter is the “Waste Management” quest, which can be found in the Engineering Deck. This quest involves cleaning up hazardous waste and repairing damaged machinery, and can provide valuable resources and upgrades.
Another side quest is the “Emergency Supplies” quest, which can be found in the Medical Deck. This quest involves searching for emergency supplies and can provide valuable resources and upgrades.
Other side quests include “Crew Expendable” and “Dead on Arrival,” which are available after completing the main story, and offer additional challenges and rewards.
Completing these side quests can provide valuable resources and upgrades that can make your journey through the game easier. Be sure to explore each area thoroughly and look for any clues or objectives that may lead you to these quests.
Dead Space Upgrade System
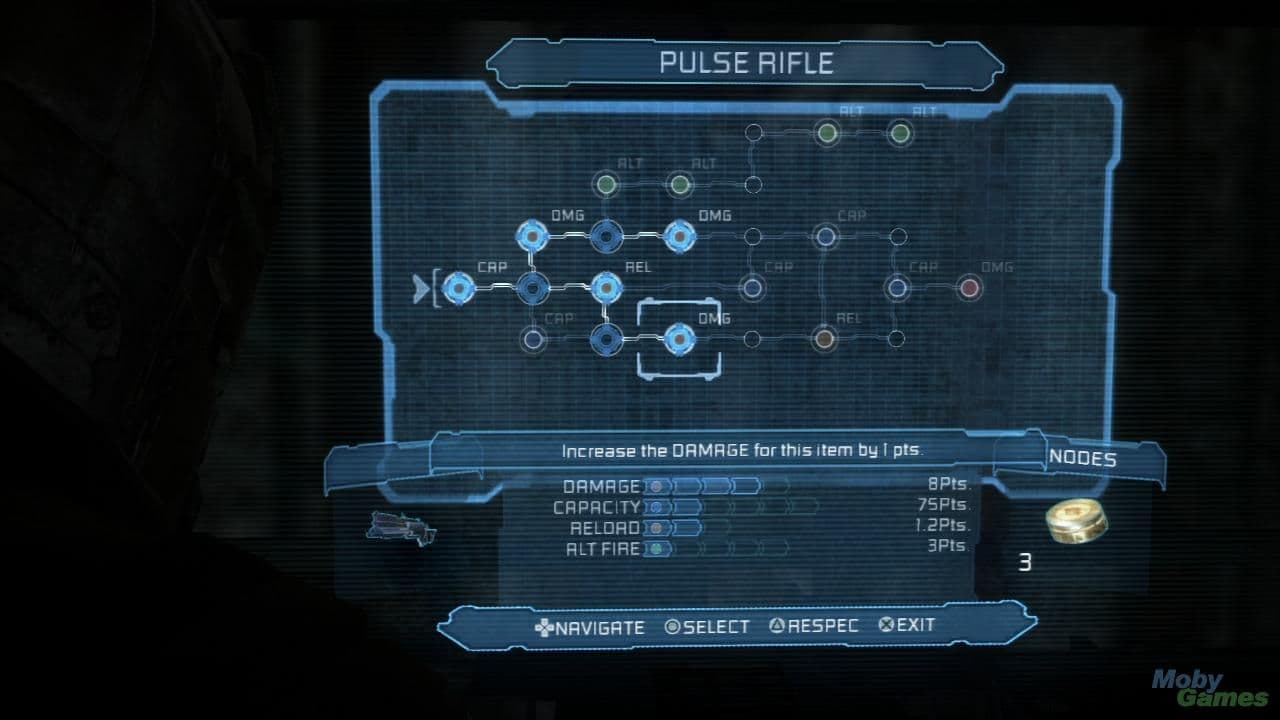
Dead Space features an upgrade system that allows you to enhance your weapons, equipment, and abilities. Upgrades can be obtained by finding power nodes throughout the game or by purchasing them at upgrade stations.
Power nodes can be found in various locations throughout the game, such as hidden rooms or behind locked doors. Once you find a power node, you can use it at an upgrade station to improve your weapons, equipment, or abilities.
There are four categories of upgrades:
Rig: Upgrades to your suit that increase your health, air supply, and inventory capacity.
Weapons: Upgrades that improve the damage, range, and ammo capacity of your weapons.
Stasis: Upgrades that increase the duration and range of your stasis ability.
Kinesis: Upgrades that increase the range and speed of your kinesis ability.
Each upgrade requires a certain number of power nodes to unlock, and more powerful upgrades require more nodes. It’s important to carefully consider which upgrades you want to invest in, as you only have a limited number of power nodes available throughout the game.
Additionally, some upgrades can only be obtained by completing specific challenges or side quests. These upgrades can provide unique abilities or enhancements that are not available through normal upgrades.
The upgrade system in Dead Space provides a way to tailor your gameplay experience to your playstyle and can make the game easier or more challenging depending on your choices. Be sure to carefully consider your upgrades and explore every area thoroughly to find all of the available power nodes.
 Crafting in Dead Space
 Crafting in Dead Space
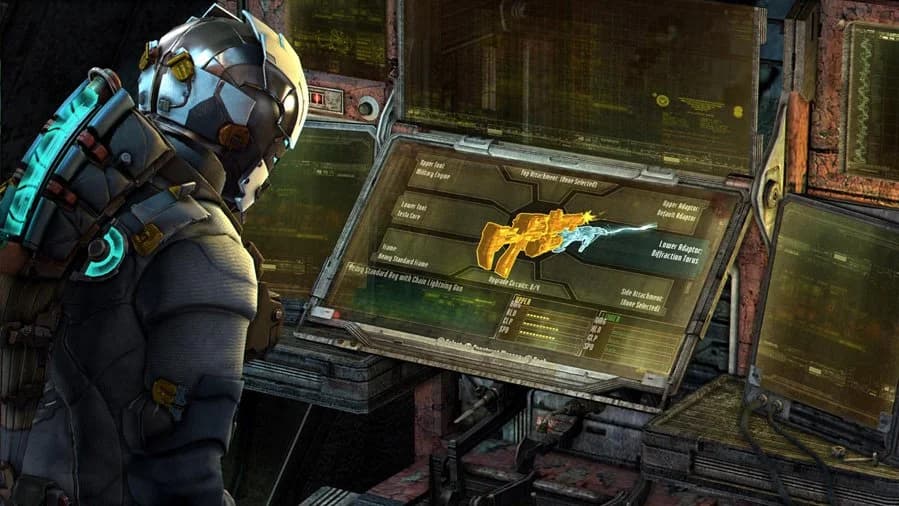
Crafting is an important aspect of Dead Space that allows you to create new weapons and items using raw materials found throughout the game. By collecting these materials and using them at a workbench, you can create weapons with unique properties and upgrade existing weapons with new attachments.
Materials can be found by exploring the various environments in the game, such as mining asteroids or searching abandoned facilities. Once you have collected enough materials, you can bring them to a workbench and select the items you want to craft.
Crafting in Dead Space allows for a high degree of customization, as you can combine different materials to create weapons with unique properties. For example, combining a plasma core with a flamethrower attachment can create a weapon that shoots fire-based plasma bolts. Similarly, combining a contact beam with a stasis amplifier can create a weapon that slows down enemies on impact.
In addition to weapons, crafting can also be used to create healing items, ammo, and other useful tools. By using crafting strategically, you can ensure that you always have the necessary resources to survive in the harsh environment of Dead Space.
Crafting is an essential aspect of Dead Space that allows for a high degree of customization and strategic planning. By carefully selecting the materials you collect and the items you craft, you can create a playstyle that suits your preferences and maximizes your chances of survival.
Is Dead Space Multiplayer?
Dead Space features a unique multiplayer mode that allows up to four players to team up and take on hordes of Necromorphs. The multiplayer mode takes place on a separate set of maps and features a different storyline than the single-player campaign.
In the multiplayer mode, players take on the roles of the members of the security team that was sent to investigate the USG Ishimura before Isaac’s arrival. Players can choose from four different classes, each with their own unique abilities and weapons. The classes are:
Engineer: Specializes in repairing and upgrading weapons and equipment.
Medic: Focuses on healing and reviving other players.
Soldier: A combat specialist with heavy weapons and armor.
Scavenger: A specialist in collecting resources and crafting.
The multiplayer mode features several different game modes, including survival, where players must fend off waves of enemies, and objective-based modes where players must complete specific objectives while fighting off enemies.
Playing the multiplayer mode can provide a unique and challenging experience, as players must work together to overcome the difficult challenges presented by the game. Additionally, playing the multiplayer mode can provide unique rewards and upgrades that are not available in the single-player campaign.
The multiplayer mode in Dead Space provides a unique and challenging experience that allows players to work together and take on the challenges of the game as a team.
Dead Space Remake: All Achievements
Story Achievements & Trophies
- Welcome Aboard: Complete Chapter 1 on any difficulty
- Lab Rat: Complete Chapter 2 on any difficulty
- All Systems Go: Complete Chapter 3 on any difficulty
- Cannon Fodder: Complete Chapter 4 on any difficulty
- True Believer: Complete Chapter 5 on any difficulty
- Greenhouse Effect: Complete Chapter 6 on any difficulty
- S.O.S.: Complete Chapter 7 on any difficulty
- Strange Transmissions: Complete Chapter 8 on any difficulty
- Wreckage: Complete Chapter 9 on any difficulty
- Keeper of the Faith: Complete Chapter 10 on any difficulty
- Betrayed: Complete Chapter 11 on any difficulty
- Exodus: Complete Chapter 12 on any difficulty
- Final Regeneration: Discover the Hunter’s Origin
- Whole Again: Pursue Nicole’s investigation
- Set a Benchmark: Complete the game on Medium difficulty or above
- Untouchable: Complete the game in Impossible Mode
- Trusted Contractor: Complete New Game Plus on any difficulty mode
Gameplay achievements and trophies
- A Cut Above: Kill 30 enemies with the Ripper
- Autofire: Kill 30 enemies with the Pulse Rifle
- Backbreaker: Kill 10 enemies with a stomp attack
- Brute Force: Kill a Brute
- Built to Order: Install every weapon upgrade
- Concordance Officer (Platinum Trophy): Collect all trophies (PS only)
- Eviscerator: Kill 30 enemies with the Line Gun
- Exterminator: Kill the Leviathan
- Freeze: Use Statis on 50 enemies
- Front Toward Enemy: Survive the Shooting Gallery
- Full Arsenal: Own every weapon in the game
- Full Clearance: Create the Master Security Override
- Full Contact: Kill 30 enemies with the Contact Beam
- Get Off My Ship!: Kill the Leviathan Remnant
- Legend Teller: Collect 150 Logs
- Live with the Hot Ones: Kill 30 enemies with the Flamethrower
- Marked: Pick up a Marker Fragment for the first time
- Marksman: Dismember 50 Limbs
- Maxed Out: Fully upgrade all weapons and equipment
- Merchant: Collect all Schematics
- Mindless Prey: Kill the Hive Mind
- One Gun: Beat the game using only the Plasma Cutter
- Pack Rat: Place 25 items in Storage
- Pusher: Kill 30 enemies with the Force Gun
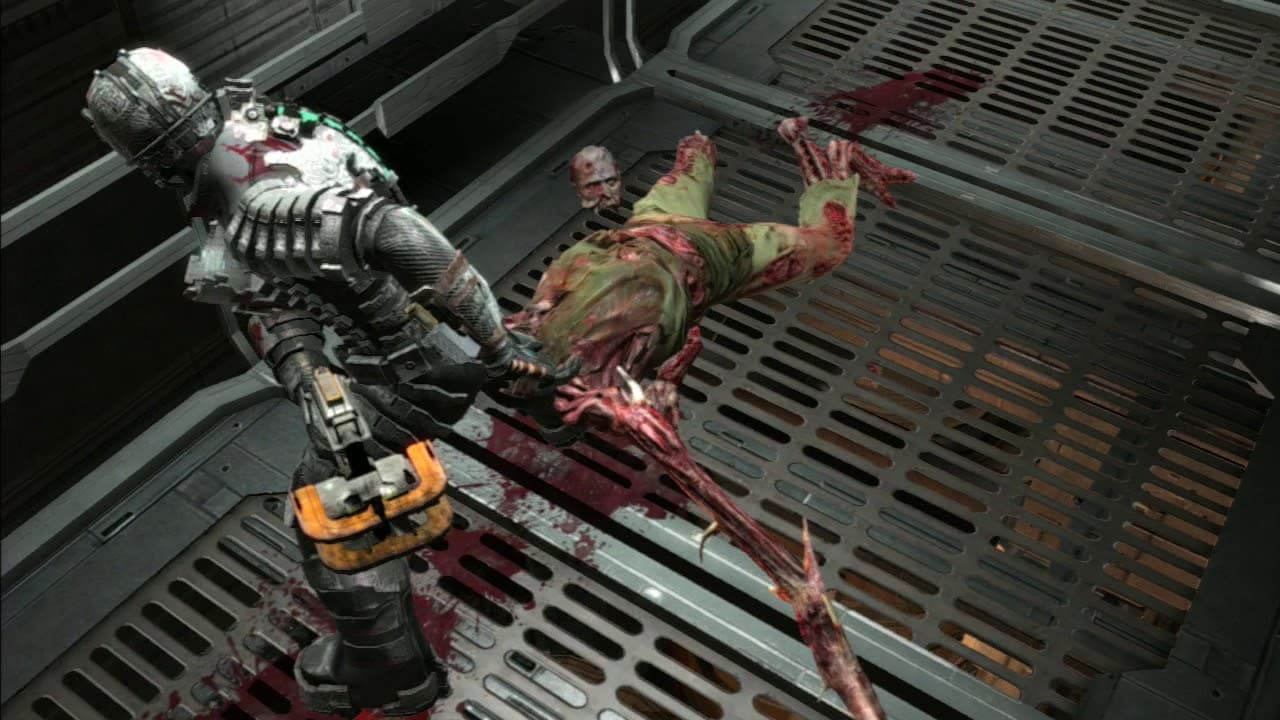
- Raise the Stakes: Pin an enemy
- Reunion: See the alternative ending on any difficulty mode
- Story Teller: Collect 75 Logs
- Surgeon: Dismember 500 Limbs
- There’s Alway Peng: Find the Peng Treasure
- Wishbone: Rip off a dangling limb using Kinesis
- Z-Baller: Complete Level 6 in Zero-G Basketball
Dead Space Tips and Tricks
To improve your gameplay experience in Dead Space, consider the following tips and tricks:
Save often: Dead Space features a limited number of save points, so it’s important to save often to avoid losing progress. Make sure to use a save point whenever you encounter one, and consider saving before entering a particularly challenging area or fighting a tough boss.
Upgrade your weapons: As mentioned earlier, upgrading your weapons is essential for success in Dead Space. Make sure to invest your resources into upgrading your favorite weapons, and experiment with different combinations of attachments to find the most effective setup for your playstyle.
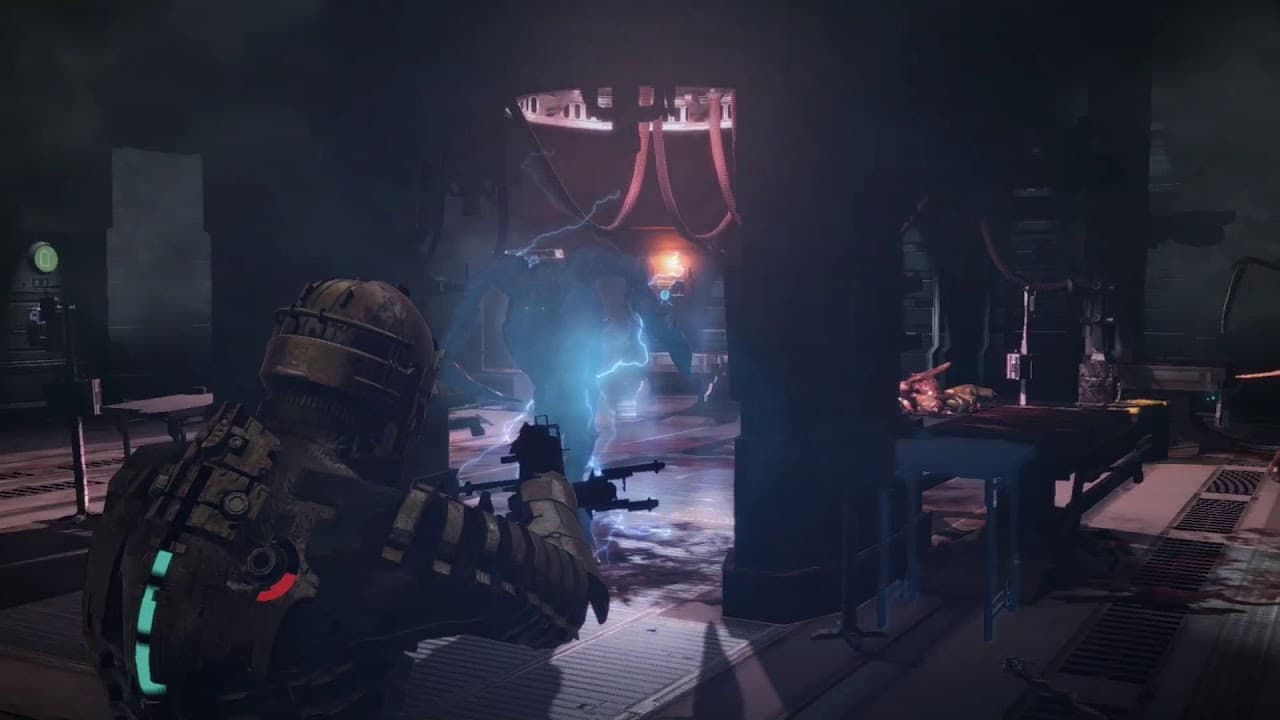
Use stasis: Stasis is a powerful ability that can be used to slow down enemies and make them easier to kill. Make sure to use stasis strategically, such as on fast-moving enemies or groups of enemies.
Aim for the limbs: In Dead Space, enemies can only be killed by dismembering their limbs. Aim for the arms and legs to disable enemies and make them easier to kill, and consider using weapons with high dismemberment capabilities for maximum effectiveness.
Keep an eye on your surroundings: Dead Space is full of environmental hazards, such as explosive barrels and debris that can be used to kill enemies. Make sure to keep an eye on your surroundings and use the environment to your advantage whenever possible.
Manage your inventory: Dead Space features a limited inventory, so it’s important to manage your items and resources carefully. Consider selling or discarding items that you don’t need, and prioritize keeping your weapons and healing items fully stocked.
Take breaks: Dead Space can be a tense and challenging game, so it’s important to take breaks when needed to avoid burnout. Consider taking short breaks between play sessions or stepping away from the game for a few minutes if you feel overwhelmed.
By following these tips and tricks, you can improve your gameplay experience in Dead Space and increase your chances of survival in the game’s harsh environments.
Latest


Lost Gems
-

Top 10 Meta Quest 2 Games For Children
-
Stormforce Gaming & The Prism iCue 6209
-
Licensed Xbox Games for Kids 2022/23
-
New Mods for Minecraft Bedrock 2023
-
The 6,6,6 Scariest Games of 2022
-
5 Great Udemy Courses For New Game Developers
-
Hearthstone Alternatives For Lovers of Card Games
-
My Top 10 Star Wars Games of All Time
-
5 of the Most Interesting Mobile Games at EGX Rezzed
-
11 Wicked Witches in Video Games | Halloween Special
-
Beginners Guide to Pokemon Go [Updated]
-
Advanced 2D and 3D Game Development Software
-
My Top 5 Boxing Games
-
Parents Guide to Minecraft
-
10 Great Kids Games From 2016 on Xbox One


You must be logged in to post a comment Login